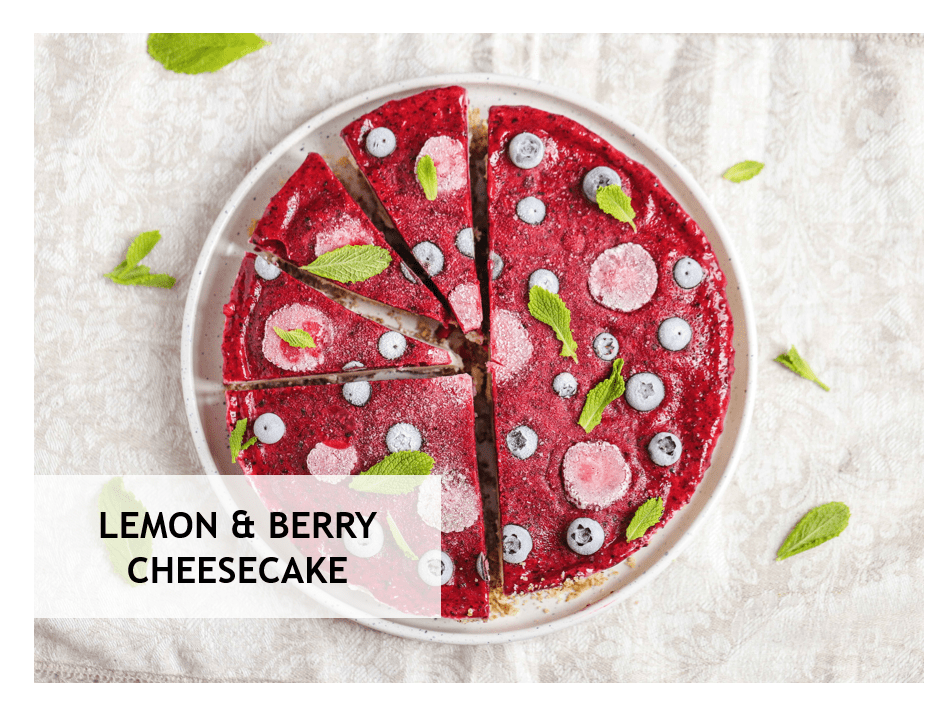
web analytics
Pineapple Upside-Down Cake

Pineapple Upside Down Cake

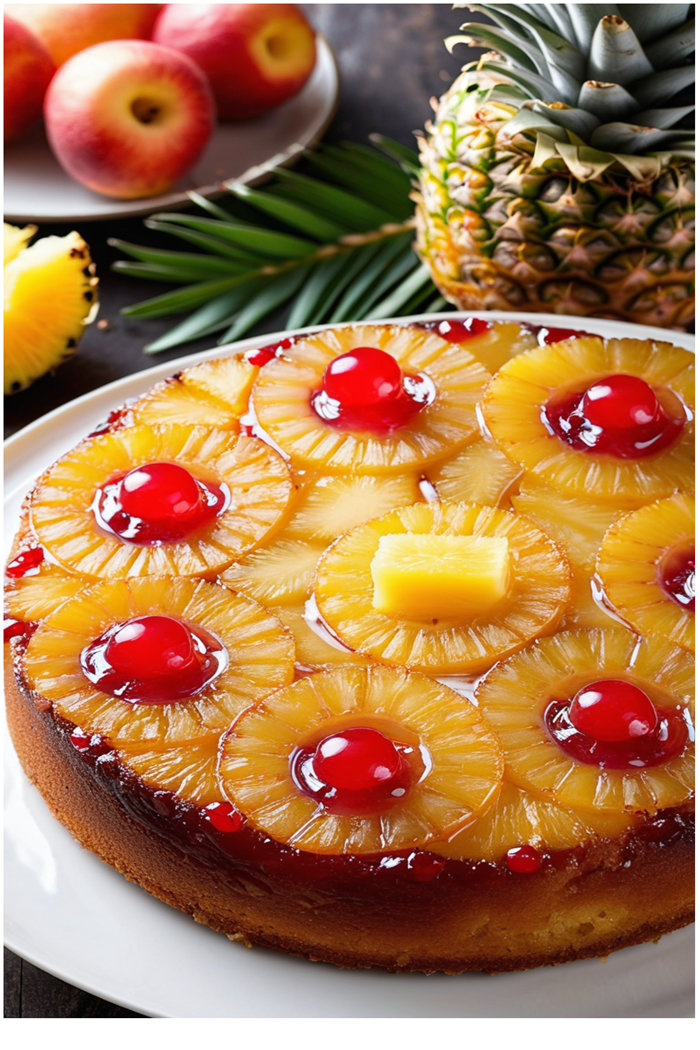
This diabetic-friendly Pineapple Upside Down Cake is a delightful twist on the classic dessert, perfect for those managing diabetes or looking to reduce their sugar intake.

The caramelized pineapple topping and tender vanilla cake come together to create a delicious and visually appealing dessert that will satisfy your sweet tooth without compromising your health.

Pineapple can be safe for people with diabetes when consumed in moderation as part of a balanced diet.

Ingredients

Pineapple Topping

– 1/4 cup unsalted butter

– 1/3 cup allulose or monk fruit sweetener

– 1 (20-ounce) can pineapple slices in juice, drained and juice reserved

– Maraschino cherries (optional)

Vanilla Cake

– 1 1/2 cups all-purpose flour

– 1 tsp baking powder

– 1/4 tsp salt

– 1/2 cup unsalted butter, softened

– 3/4 cup allulose or monk fruit sweetener

– 2 large eggs

– 1 tsp vanilla extract

– 1/2 cup reserved pineapple juice

Instructions

1. Preheat the oven to 350ยฐF (175ยฐC). Grease a 9-inch round cake pan.

2. For the pineapple topping, melt the butter in a small saucepan over medium heat. Stir in the sweetener and cook until dissolved. Pour the mixture into the prepared cake pan, spreading it evenly.

3. Arrange the pineapple slices in a single layer on top of the butter-sweetener mixture. Place a maraschino cherry in the center of each pineapple slice, if desired.

4. In a medium bowl, whisk together the flour, baking powder, and salt.

5. In a large bowl, beat the softened butter and sweetener until light and fluffy. Add the eggs one at a time, beating well after each addition. Stir in the vanilla extract.

6. Gradually add the flour mixture to the butter mixture, alternating with the reserved pineapple juice. Mix until just combined.

7. Pour the batter evenly over the pineapple slices in the cake pan.

8. Bake for 40-45 minutes, or until a toothpick inserted into the center of the cake comes out clean.

9. Allow the cake to cool in the pan for 10 minutes. Run a knife around the edge of the pan to loosen the cake, then invert it onto a serving plate.

10. Serve warm or at room temperature.

Note that pineapple has a medium glycemic index (GI) score of 66, which means it can have a moderate effect on blood sugar levels.

So please dont go overboard with your portion sizes!

Angel Food Cake

Angel Cake

Angel food cake is a light, airy dessert that traditionally relies on sugar to achieve its delicate texture. However, for those managing diabetes, enjoying this classic sweet treat can be challenging.

This diabetic-friendly version uses natural sweeteners like allulose and monk fruit extract to create a delightful, guilt-free dessert that won’t cause a blood sugar spike. Enjoy a slice of this heavenly cake without compromising on your dietary needs.

Ingredients

For the Cake:

  • 1 cup cake flour
  • 1 1/2 cups powdered allulose
  • 1/4 cup powdered monk fruit sweetener
  • 1 1/2 cups egg whites (about 11-12 large eggs), at room temperature
  • 1 1/2 teaspoons cream of tartar
  • 1/4 teaspoon salt
  • 1 teaspoon vanilla extract
  • 1/2 teaspoon almond extract

Instructions

  1. Preheat Oven:
    Preheat your oven to 350ยฐF (175ยฐC). Ensure your tube pan (angel food cake pan) is clean and dry. Do not grease the pan.
  2. Prepare the Dry Mixture:
    • Sift the cake flour and 3/4 cup of powdered allulose together three times. This helps to ensure a light and airy texture for the cake.
  3. Prepare the Egg Whites:
    • In a large mixing bowl, beat the egg whites, cream of tartar, and salt on medium speed until the mixture becomes frothy.
    • Gradually add the remaining 3/4 cup of powdered allulose and the powdered monk fruit sweetener, a tablespoon at a time, while continuing to beat the mixture.
    • Increase the mixer speed to high and beat until the egg whites form stiff, glossy peaks. Be careful not to overbeat.
    • Beat in the vanilla and almond extracts just until blended.
  4. Combine and Fold:
    • Sift about one-third of the flour mixture over the beaten egg whites. Gently fold the flour into the egg whites using a spatula.
    • Repeat this process two more times with the remaining flour mixture, folding gently each time until all the flour is incorporated and the mixture is smooth.
  5. Bake the Cake:
    • Spoon the batter evenly into the tube pan. Run a knife through the batter to eliminate any large air bubbles.
    • Bake in the preheated oven for 35-40 minutes, or until the top is golden brown and a toothpick inserted into the center comes out clean.
    • Immediately invert the pan onto a heatproof bottle or funnel and let the cake cool completely in the pan.
  6. Release and Serve:
    • Once the cake is completely cooled, run a knife around the edges of the pan and the center tube to release the cake.
    • Carefully remove the cake from the pan and place it on a serving plate.
    • Slice and enjoy plain, or serve with fresh berries and a dollop of sugar-free whipped cream if desired.

Angel cake is ideal for light, celebratory occasions like birthdays, baby showers, bridal showers, or afternoon tea parties.

Its airy texture and subtle sweetness make it a delightful treat for gatherings where a delicate, elegant dessert is appreciated. 

Coffee cake

Coffee cake recipe

Coffee cake is a classic dessert that pairs perfectly with your morning coffee or afternoon tea. 

For those managing diabetes, enjoying this sweet indulgence might seem challenging.  But due to it being sweetened with natural alternatives like allulose and monk fruit extract, this recipe allows you to enjoy the warm, comforting taste of coffee cake without worrying about a spike in your blood sugar levels.

Ingredients

For the Cake:

– 1 1/4 cups almond flour

– 1/2 cup coconut flour

– 1/2 cup allulose

– 1/4 cup monk fruit extract

– 1 teaspoon baking powder

– 1/2 teaspoon baking soda

– 1/2 teaspoon salt

– 1 teaspoon ground cinnamon

– 4 large eggs, at room temperature

– 1/2 cup unsweetened almond milk

– 1/4 cup melted coconut oil

– 1 teaspoon vanilla extract

For the Streusel Topping:

– 1/2 cup almond flour

– 1/4 cup chopped nuts (pecans or walnuts)

– 2 tablespoons allulose

– 1 tablespoon monk fruit extract

– 2 teaspoons ground cinnamon

– 3 tablespoons melted coconut oil

For the Glaze:

– 1/2 cup powdered monk fruit sweetener

– 2-3 teaspoons unsweetened almond milk

– 1/2 teaspoon vanilla extract

Instructions

1. Preheat Oven:

   Preheat your oven to 350ยฐF (175ยฐC). Grease an 8×8 inch square baking pan and line it with parchment paper.

2. Prepare the Streusel Topping:

   – In a small bowl, combine almond flour, chopped nuts, allulose, monk fruit extract, and ground cinnamon.

   – Add the melted coconut oil and mix until the mixture is crumbly.

   – Set aside.

3. Prepare the Cake:

   – In a large bowl, whisk together almond flour, coconut flour, allulose, monk fruit extract, baking powder, baking soda, salt, and ground cinnamon.

   – In another bowl, whisk together the eggs, unsweetened almond milk, melted coconut oil, and vanilla extract.

   – Gradually add the wet ingredients to the dry ingredients, stirring until just combined.

   – Pour the batter into the prepared baking pan and spread it out evenly.

4. Add the Streusel Topping:

   – Sprinkle the streusel topping evenly over the cake batter.

5. Bake the Cake:

   – Bake in the preheated oven for 30-35 minutes, or until a toothpick inserted into the center comes out clean.

   – Allow the cake to cool in the pan for about 15 minutes before transferring it to a wire rack to cool completely.

6. Prepare the Glaze:

   – In a small bowl, whisk together the powdered monk fruit sweetener, unsweetened almond milk, and vanilla extract until smooth.

   – Drizzle the glaze over the cooled coffee cake.

7. Serve and Enjoy:

   – Cut the cake into squares and serve. Enjoy your diabetic-friendly coffee cake alongside a cup of your favorite coffee or tea!

Chocolate Dipped Biscotti biscuits

Chocolate-Dipped Almond Flour Biscotti (perfect for dipping in coffee)

Youโ€™re enjoying a cozy, quiet morning at home, the first rays of sunlight filtering through your kitchen window as you sit at your table, cradling a steaming mug of coffee. 

Beside your cup rests a plate of freshly baked Chocolate-Dipped Almond Flour Biscotti, their crisp, golden edges and rich, dark chocolate coating beckoning you to take a bite. 

As you dunk a biscotti into your warm beverage, you can’t help but smile, knowing that these delightful treats are not only satisfying but also crafted with wholesome ingredients like almond flour and natural sweeteners, making them a perfect indulgence for those managing diabetes. 

The biscotti’s delicate crunch gives way to a tender, slightly chewy center, the nutty notes of almond flour harmonizing perfectly with the deep, decadent flavor of the chocolate. Each bite is a moment of pure bliss, a delightful respite from the day’s responsibilities. 

These Chocolate-Dipped Almond Flour Biscotti are proof that with a few simple ingredient swaps, you can create delicious and satisfying treats that align with your health goals, allowing you to savor life’s little pleasures without compromise.

Ingredients

For the biscotti:

– 2 cups almond flour

– 1/2 cup allulose or monk fruit sweetener

– 1 tsp baking powder

– 1/4 tsp salt

– 2 large eggs

– 1 tsp vanilla extract

– 1/2 cup sliced almonds

For the chocolate dip:

– 4 oz sugar-free dark chocolate, chopped

– 1 tsp coconut oil

Instructions

1. Preheat your oven to 350ยฐF (175ยฐC). Line a baking sheet with parchment paper.

2. In a large bowl, whisk together the almond flour, sweetener, baking powder, and salt.

3. In a separate bowl, beat the eggs and vanilla extract until well combined.

4. Add the wet ingredients to the dry ingredients and mix until a dough forms. Fold in the sliced almonds.

5. Divide the dough in half and shape each half into a log, about 10 inches long and 2 inches wide, on the prepared baking sheet.

6. Bake for 25-30 minutes, or until the logs are golden brown and firm to the touch.

7. Remove the logs from the oven and let them cool on the baking sheet for 10 minutes.

8. Using a serrated knife, cut the logs diagonally into 1/2-inch thick slices.

9. Place the slices cut-side down on the baking sheet and return them to the oven. Bake for an additional 10-15 minutes, or until the biscotti are crisp and lightly golden.

10. Remove the biscotti from the oven and let them cool completely on a wire rack.

11. To make the chocolate dip, melt the chopped sugar-free dark chocolate and coconut oil in a double boiler or the microwave, stirring until smooth.

12. Dip one end of each biscotti into the melted chocolate, then place them on a parchment-lined baking sheet to set.

13. Once the chocolate has hardened, store the biscotti in an airtight container at room temperature for up to 1 week.

Diabetic friendly Chocolate Brownies. Yumm!

How’d you love to enjoy the rich and satisfying taste of chocolate brownies without worrying about your sugar levels?

Well, now you can with this diabetic-friendly version of the popular sweet treat.

These brownies are sweetened with natural sweeteners like Allulose and Monk fruit extract, offering a delightful treat that’s friendly for those managing diabetes.

Enjoy the classic fudgy texture and deep chocolate flavor in a healthier way.

Ingredients

โ€ข 1/2 cup almond flour

โ€ข 1/2 cup unsweetened cocoa powder

โ€ข 1/4 teaspoon baking powder

โ€ข 1/4 teaspoon salt

โ€ข 2 large eggs

โ€ข 1/2 cup Allulose

โ€ข 1/4 cup Monk fruit extract

โ€ข 1/2 cup unsalted butter, melted

โ€ข 1 teaspoon vanilla extract

Instructions

  1. Preheat your oven to 350ยฐF (175ยฐC) and line an 8-inch square baking pan with parchment paper.

2. In a medium bowl, whisk together the flour, cocoa powder, baking powder, and salt.

3. In a separate large bowl, beat the eggs, Allulose, and Monk fruit extract until well combined.

4. Add the melted butter and vanilla extract to the egg mixture and mix well.

5. Gradually fold in the dry ingredients until just combined; avoid overmixing.

6. Pour the batter into the prepared baking pan and smooth the top with a spatula.

7. Bake for 20-25 minutes, or until a toothpick inserted into the center comes out mostly clean with a few moist crumbs.

8. Allow the brownies to cool in the pan for 10 minutes, then transfer to a wire rack to cool completely.

9. Cut into squares and serve.

Enjoy your delicious, diabetic-friendly chocolate brownies that are sure to satisfy your sweet tooth while keeping your health in check!

Remember, moderation is key even with healthier versions of sweet treats.

Vanilla Bean Cupcakes – Perfect for tea with friends

Itโ€™s a sun-drenched afternoon, the warm breeze carrying the sweet scent of blooming flowers through your open kitchen window. As you prepare for a delightful tea party with your closest friends, you carefully arrange a platter of these freshly baked Vanilla Bean Cupcakes. 

These cupcakes are a delightful twist on a classic treat, made with wholesome almond flour and natural sweeteners like allulose or monk fruit extract, creating a delicious and guilt-free indulgence perfect for those managing diabetes. 

With these delightful Vanilla Bean Cupcakes you can enjoy a sweet treat while prioritizing your health and well-being. These cupcakes are a testament to the fact that with a few simple ingredient swaps, you can create delicious and satisfying desserts that align with your dietary goals.

Ingredients

For the cupcakes:

– 2 cups almond flour

– 1/2 cup allulose or monk fruit sweetener

– 2 tsp baking powder

– 1/4 tsp salt

– 1/2 cup unsweetened almond milk

– 2 large eggs

– 1/4 cup melted coconut oil or butter

– 2 tsp vanilla bean paste or vanilla extract

For the frosting:

– 1/2 cup unsalted butter, softened

– 1/2 cup allulose or monk fruit sweetener, powdered

– 1/4 cup heavy cream

– 1 tsp vanilla bean paste or vanilla extract

Instructions

1. Preheat your oven to 350ยฐF (175ยฐC). Line a 12-cup muffin tin with cupcake liners.

2. In a large bowl, whisk together the almond flour, sweetener, baking powder, and salt.

3. In a separate bowl, combine the almond milk, eggs, melted coconut oil or butter, and vanilla bean paste or extract. Whisk until well combined.

4. Add the wet ingredients to the dry ingredients and mix until a smooth batter forms.

5. Divide the batter evenly among the prepared cupcake liners, filling each about 2/3 full.

6. Bake for 18-20 minutes, or until a toothpick inserted into the center of a cupcake comes out clean.

7. Remove the cupcakes from the oven and let them cool in the tin for 5 minutes before transferring them to a wire rack to cool completely.

8. To make the frosting, beat the softened butter and powdered sweetener in a large bowl until light and fluffy.

9. Gradually add the heavy cream and vanilla bean paste or extract, beating until the frosting is smooth and creamy.

10. Once the cupcakes have cooled, frost them with the vanilla bean frosting and serve.

Matcha Energy Balls

Matcha has skyrocketed in popularity these last few years.

And not just the tea variety.๐Ÿต

You can now get matcha shots, lattes, and even desserts. ๐Ÿก

Matcha comes from tea leaves, but tea leaves prepared in an extra special way.๐Ÿƒ

To make matcha, the tea plants are covered 20-30 days before harvest. 

This reduces direct sunlight and allows the level of chlorophyll in the leaves to go up.

Why’s higher chlorophyll a good thing?

Because chlorophyll is high in amino acids and health enriching antioxidants. 

In fact, studies show that thanks to is high chlorophyll content… 

Matcha offers benefits for the liver… heart health… brain function… and even weight loss.๐Ÿค—๐Ÿ’—

In my Matcha Energy Ball recipe you get the benefits of matcha combined with the energy lift of vanilla protein. 

With a drizzle of maple syrup, my Matcha Energy Balls offer a sweet tasting, energy and all round health booster.๐Ÿต๐Ÿƒโ€โ™€๏ธ

And because my recipes contains none of the nasty additives or sugars of energy boosting drinks, you get a purer, freer flowing energy buzz:

Sugar Free Banana & Almond Muffins

Do you struggle with cravings for sugary snacks, cakes and chocolate?

You’re not alone.

Sugar is HIGHLY addictive, because it triggers the reward centers in the brain, and releases ‘dopamine’ – the brain’s reward chemical.

This is the BIGGEST reason many people find switching to a healthy diet so hard – They  still crave the sweet dopamine release they get from sugar.

But here’s the thing…

Sugar addiction is only temporary.

You can wean yourself off it in as little as 2 weeks. 

And when your taste buds have adjusted to enjoying more savoury snacks, you may wonder why you enjoyed such sugary tasting food at all!

There are plenty of healthy alternatives to sugar. Ingredients with a sweet taste but without the health dangers of sugar.

My Sugar Free Banana & Almond Muffins recipe is a great example.

It gets its sweetness from almond butter, maple syrup and bananas, rather than sugar. So it allows you to enjoy a sweet treat for dessert without the guilt of sugary snacks. 

And it’s a heck of a lot less fattening too!

Skip to content